6. Mono for Arduino Hackers
You can use the familiar Arduino IDE to build Mono applications. This guide will take you through the steps of how to do this.
Prerequisites
I assume you are familiar with Arduino, its coding IDE and the API’s like pinMode() etc. I also assume that you have the IDE installed, and it is version 1.6.7 or above. You do not have to follow any other of the getting started guides. Arduino IDE development for Mono is completely independed. If this is the first Mono guide you read, it is all good.
Overview
You can code Mono using 2 approaches: Native Mono or the Arduino IDE. The difference is the tools you use, and the way you structure your code. In the Arduino approach you get the familiar setup() and loop() functions, and you use the Arduino IDE editor to code, compile and upload applications to Mono.
Under the hood we still use the native Mono API’s and build system, we just encapsulate it in the Arduino IDE.
Installation
The Arduino IDE has a plugin system, where you can add support for third-party boards. We use such a plugin, that adds Mono as a target board. To install the plugin we use the Board Manager, that can install new target boards.
Note
You need Arduino IDE version 1.6 or above to utilize the Board Manager feature. You can download Arduino IDE here: arduino.cc
Add Mono as a board source
To make the Board Manager aware of Mono’s existence, you must add a source URL to the manager. You do this by opening the preferences window in Ardiono IDE. Below is a screenshot of the window:
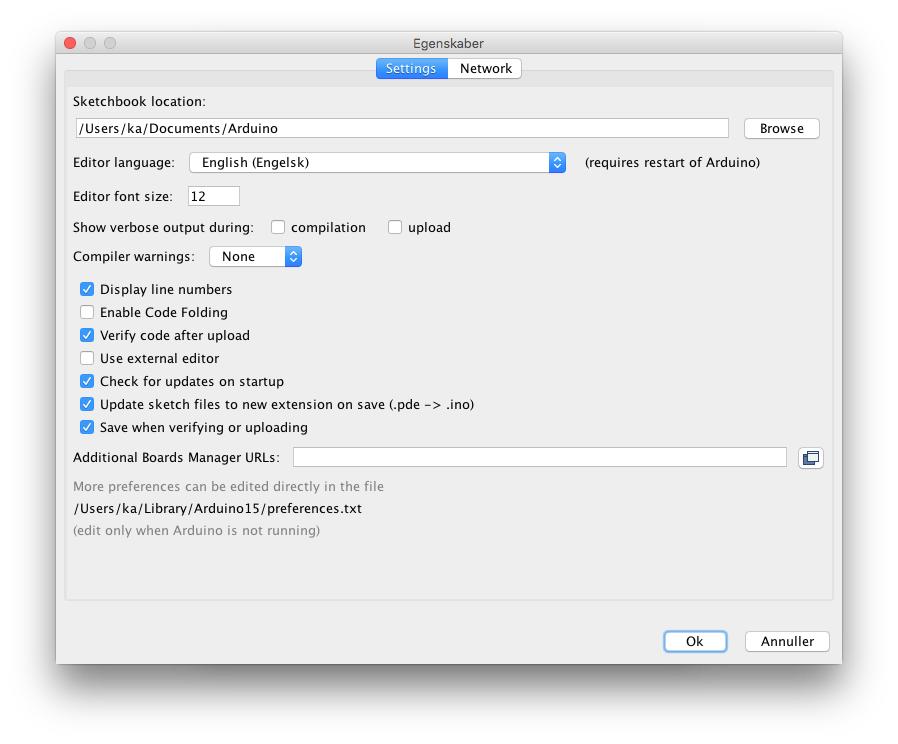
In the text field called Additional Boards Manager URLs type in the URL for Mono board package:
https://github.com/getopenmono/arduino_comp/releases/download/current/package_openmono_index.json
And press OK.
Install the board package
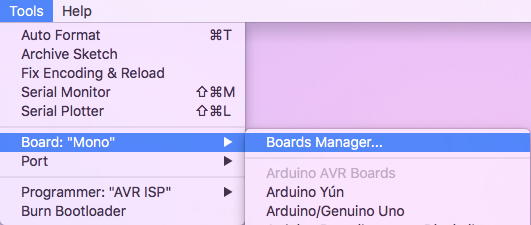
Now, open the Board Manager by selecting the menu: Tools -> Boards -> Board Manager:
The Board Manager appears, and query the source URLs for new board types. It will discover a new board type OpenMono. Select the type Contributed, in top left corner:
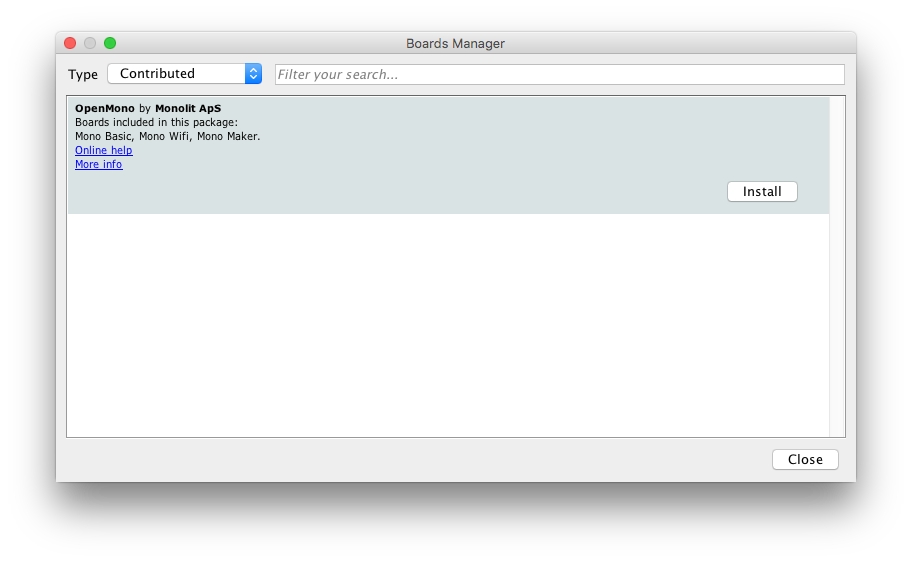
Now click on the Install button to download and install all the needed tools to build mono applications. This might take a few minutes.
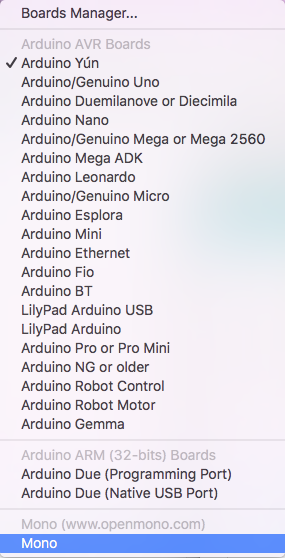
When the installation is done, you can close the Board Manager and return the main window. Now select Mono from the list of available target boards:
Install the USB Serial Port Driver
If you run Windows, there is an additional step. (Mac users, you can skip this section.) Windows need to detect the Mono hardware as an USB CDC device and create an ol’ fashion COM port. So download the USB device definition driver by right clicking the link and choosing Save file as:
Download Windows Serial Port Driver
Run the installer, and you are ready to use Mono.
Limitations
The standard Arduino boards are much simpler than Mono. For example: They can be turned off and they have bare pin headers. Arduino API are made to make digital and analog communication simple. You have functions like digitalWrite and analogRead. While you have these functions available, you do not have any pin headers sticking out of Mono chassis! You need the Arduino Shield Adaptor or to build your own hardware to really take advantage of the Arduino API.
Mono’s API is much more high-level, meaning that you have functions like Render text on the screen, and the software library (Mono Framework) will handle all the communication for you. Luckily you can still do this from inside the Arduino IDE.
Our additions to the default Arduino sketch
There are some key differences between Arduino and Mono, most important the power supply. You can always turn off an Arduino by pulling its power supply, but that is not true for mono. Here power is controlled by software.
By default we have added some code to the Arduino sketch template, so it will power on/off when pressing the User button. Also, we added the text Arduino to the display, such that you know your Mono is turned on.
Hello World
Let us build a Hello World application, similar to the one in the The obligatory Hello World project guide. We start out with the default Arduino project template:
    void setup() {
        // put your setup code here, to run once:

    }

    void loop() {
        // put your main code here, to run repeatedly:

    }
We will use the class TextLabelView to displat text on the screen. A TextLabel has a size and a position on the screen, which is defined by the class Rect that represents a rectangle.
Context issue
You might think we just create the TextLabel in the setup() function like this:
    void setup() {
        // put your setup code here, to run once:

        mono::ui::TextLabelView helloLbl;

    }
But this approach will deallocate the textlabel as soon as the setup() function returns. This means it cannot be rendered to the screen, because it have to be present in memory when screen repaints occur.
The correct approach here is to create a class (say MyClass), and let the TextLabel be a member of that class. We than create an object of the class in te global context. (Outside the setup() and loop() functions.) But all this will be out of scope with this tutorial, so we will do it the ugly way . Just know that having many global context objects, is a bad thing programmatically.
Adding the TextLabel
The complete code added to the project global context and in the setup() function:
#include <mono.h>                 // 1

mono::ui::TextLabelView textLbl;  // 2

void setup() {

  textLbl = mono::ui::TextLabelView(mono::geo::Rect(30, 73, 176, 20), "Hi, I'm Mono");  // 3
  textLbl.show();               // 4
}

void loop() {
}
I have numbered the interesting source code lines, let go through them one by one:
- We include the Mono Framework, to have access to Mono’s API.
- Here we define the global TextLabel object called
textLbl. Because it is global it will stick around and not be deallocated. - Construct a TextLabelView with a rectangle object (Rect), and give the position \((30,73)\) and dimension \((176,20)\). In the constructors second parameters we set the text content on the TextLabel. This is the text that will be displayed on the screen.
- We tell the TextLabel to render itself on the screen. All UI widgets are hidden by default. You must call
show()to render them.
Now you can press the compile button () and see the code compiles. If you have Mono connected you can upload the application by pressing the button.
Notice that we did not need to put any code inside the loop() function.
Enhancing the look and feel
To make our Hello World exactly like the The obligatory Hello World project guide, we need to add some refinements to it. We need to center the text on the screen and to color it a fancy red color. But that easy, just two calls added to the setup() function:
    textLbl.setAlignment(mono::ui::TextLabelView::ALIGN_CENTER);

    textLbl.setTextColor(mono::display::AlizarinColor);
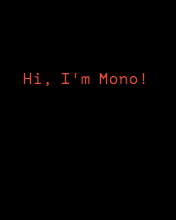
Now, if you build and run the application the text will be a fancy color and centered on the screen:
C++ from Arduino IDE
Even tough Arduino is actually coded in C++, the C++ features are not utilized (that much). Some programmers might think they code in C, and not C++ - which is to some extend correct. Still, Arduino IDE uses the C++ compiler.
In Mono’s SDK we use the C++ feature set more extensively. This means that C developers might see unfamiliar keywords or syntax constructs, like new and ::.
If you are not familiar with C++, I urge you to read our C programmer’s guide to C++. This guide is a brief tour of C++ explained for C developers.
Further reading
Now you know how to build mono applications from the Arduino IDE. You might what dive into the native API and build system, or reading one of the in-depth articles:
- C programmer’s guide to C++ : How C++ differs from good old C
- Install the native framework : Install the native mono build system
- Architectural Overview : About application lifecycles and structure.
Happy hacking.